
Table of Contents
Buying a used excavator is a major investment. A disciplined approach — centered on a clear used excavator inspection checklist — reduces risk and gives you leverage in negotiations. Below is a practical guide to the inspection items that really matter, structured so you can follow step-by-step at the yard or auction.
Why a Used Excavator Inspection Checklist Matters

A standard checklist turns impressions into measurable data. Instead of guessing from photos or a quick walk-around, this inspection framework helps you quantify machine condition, compare units objectively, and estimate future maintenance cost. Use the checklist to identify red flags early and prioritize machines with verifiable service histories.
Core Sections of a Used Excavator Inspection Checklist
A complete inspection covers seven core areas. Follow each section in order and record findings for a side-by-side comparison between machines.
1) Exterior & Frame
Start with a thorough visual audit of the boom, arm, bucket, welds, and chassis. Look for repaired cracks, mismatched paint (possible structural work), straightness of pins, and signs of fatigue. Small photo-documented issues here often predict larger internal problems.
2) Undercarriage
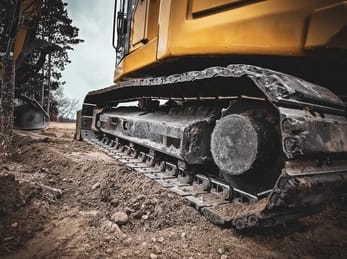
The undercarriage typically drives replacement costs. Measure track link wear, sprocket tooth profile, roller condition, and track tension. Uneven wear or thin rails can make an otherwise good machine uneconomical.
3) Engine & Fluids3
Check oil level and color, coolant clarity, and signs of cross-contamination. A compression or leak-down test will reveal serious engine problems. Review any available oil analysis reports — they are worth their weight in due diligence.
4) Hydraulics4
Inspect hoses, cylinders, and fittings for leaks, pitting, or signs of overheating. Measure system pressure and check for cavitation noises during operation. Undetected hydraulic issues often become the highest-cost repairs.
5) Electrical & Controls5
Test switches, gauges, indicators, and the starter system. Modern machines rely heavily on electronic controls; intermittent faults can cause downtime and be expensive to diagnose.
6) Test Operation6
A live operational test is mandatory. Evaluate idle behavior, swing speed, boom smoothness, travel under load, and bucket response. Note any lag, vibration, or temperature spikes. Record findings to compare with the vehicle’s service history.
7) Documentation & Hours7
Verify service records, ownership history, and hour meter consistency. Confirm any major component replacements and check for gaps in maintenance. Working hours and a clean service log substantially improve resale predictability.
Red Flags and Negotiation Triggers
Watch for evidence of structural repairs, repeated hydraulic leaks, smoke under load, inconsistent hour readings, and lack of service records. Use documented issues from the inspection as negotiation points — even cosmetic problems can be leveraged to reduce price or require onsite repairs before acceptance.
How to Use the Checklist in Practice
Bring a printed form or a tablet with the inspection list pre-loaded. Score each area 1–5 and total the score to create a rapid “buy / re-bid / walk away” decision model. For high-value purchases, engage a certified inspector to perform a more detailed non-destructive test.
Final Advice
Treat the inspection as a risk assessment, not just a shopping list. The right used excavator inspection checklist helps you avoid costly surprises and focus on machines that will deliver predictable uptime. When in doubt, prioritize documented maintenance and a clean undercarriage — those two items will usually tell you more about future costs than a low asking price.